Kohler K-9136-CP Installation Guide
Browse online or download Installation Guide for Unknown Kohler K-9136-CP. KOHLER K-9136-CP Installation Guide User Manual
- Page / 24
- Table of contents
- BOOKMARKS
- 1090854-2-B 1
- 1090854-2-B 2 Kohler Co 2
- Tools/Outils/Herramientas 3
- Información importante 4
- Kohler Co. 5 1090854-2-B 5
- Installation 10
- Instalación 11
- Care and Cleaning 17
- Entretien et nettoyage 17
- Cuidado y limpieza 18
- One-Year Limited Warranty 18
- Garantie limitée d’un an 19
- Garantía limitada de un año 19
- 1090854-2-B 20 Kohler Co 20
- Kohler Co. 21 1090854-2-B 21
- 1090854-2-B Kohler Co 22
- Kohler Co. 1090854-2-B 23
Summary of Contents
Installation and Care GuideGuide d’installation et d’entretienGuía de instalación y cuidadoShower DrainDrain de doucheDesagüe de duchaM product number
InstallationStep 5 — Prepare Waterproof MembraneMeasure and mark the perimeter of the shower base on the waterproof membrane.Mark an additional 8″ (20
Installation (cont.)Avec l’excès de membrane étanche, découper un cercle de 2″ (5,1 cm) plus largeque la circonférence marquée.Avec de l’adhésif pour
Installation (cont.)Apply CPE sealant around the drain.Step 7 — Waterproof Membrane LayerWith assistance, lift the waterproof membrane in place. Align
Instalación (cont.)Trabajando desde la salida del desagüe a las paredes, alise las burbujas que puedahaber debajo de la membrana impermeable.Fije la m
Installation (cont.)Insert an inset into the drain, then fill the shower base with water. Allow thewater to sit overnight.Check for leaks. Apply patche
InstalaciónPaso 8 — Ensamble el desagüeMida el grosor del azulejo, luego consulte la sección del ″Diagrama de instalación″para determinar la orientaci
InstallationStep 9 — Tile LayerSpread tile spacers over the weep holes of the drain. This will prevent mortarfrom plugging the holes.Using mortar, bui
Installation (cont.)Avec du mortier, construire la base de douche au périmètre marqué. Baisser lemortier autour de l’anneau de la crépine afin de perme
Entretien et nettoyage (cont.)•Utiliser une éponge ou un chiffon doux et humide. Ne jamais utiliser de matériauabrasif tel que brosse ou éponges à réc
Garantie limitée d’un anLes produits de plomberie KOHLER sont garantis contre tout défaut matériel et defabrication pour un an, à partir de la date de
Thank You For Choosing Kohler CompanyThank you for choosing Kohler Company. Your Kohler Company product reflects thetrue passion for design, craftsmans
Service Parts/Pièces de rechange/Piezas de repuesto**Finish/color code must be specified when ordering.**Vous devez spécifier les codes de la finition
Service Parts/Pièces de rechange/Piezas de repuesto (cont.)1089551Strainer BodyCorps de la crépineCuerpo de la coladera1082514**ScrewVisTornillo109109
1090854-2-B Kohler Co.
Kohler Co. 1090854-2-B
1090854-2-B
Tools/Outils/HerramientasImportant InformationObserve all local plumbing and building codes.It is strongly recommended that a professional mason and p
Información importanteCumpla con todos los códigos locales de plomería y construcción.Se recomienda enfáticamente que un albañil y plomero profesionis
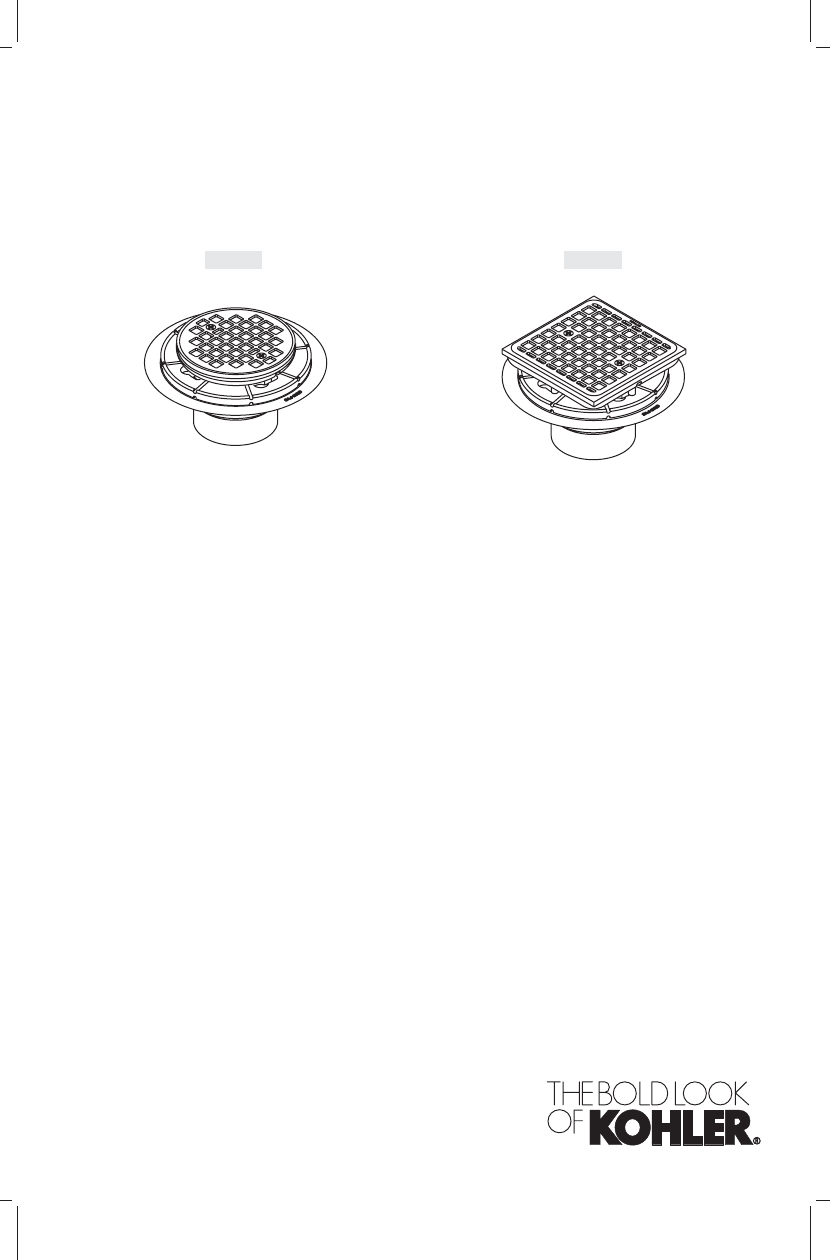
Roughing-In/Plan de raccordement/Diagrama de instalaciónK-91365-3/8" (13.7 cm) D.Ø 5-3/8" (13.7 cm)5-3/8" (13,7 cm) D.4-1/4" (10.8
InstallationStep 1 — Building Paper LayerStaple building paper to the subfloor of the shower base. Do not cover the drainoutlet with building paper.Ste
InstallationÉtape 1 — Couche de papier de constructionAgrafer le papier de construction au plancher à la base de douche. Ne pas couvrirla sortie de dr
InstallationStep 3 — Galvanized Lath LayerMark the height of the bottom of the flange adapter on the wall furthest from thecenter of the drain.Using a
Installation (cont.)Agrafer la latte galvanisée sur le papier de construction.Découper un orifice de 7″ (17,8 cm) de diamètre dans la latte à 1/2″ (1,3
Related products and manuals for Unknown Kohler K-9136-CP


 (12 pages)
(24 pages)
(168 pages)
(24 pages)
(2 pages)
(2 pages)
(1 pages)
(12 pages)
(24 pages)
(168 pages)
(24 pages)
(2 pages)
(2 pages)
(1 pages)
© 2020, manymanuals.com. All rights reserved. | 1.291 s |
 Manymanuals.com
 Manymanuals.de
 Manymanuals.fr
 Manymanuals.it
 Manymanuals.pl
 Manymanuals.cz
 Manymanuals.es
 Manymanuals-pt.com
Comments to this Manuals