Kohler K-6269-C11-BN Installation Guide
Browse online or download Installation Guide for Sanitary ware Kohler K-6269-C11-BN. KOHLER K-6269-C11-BN Installation Guide User Manual
- Page / 20
- Table of contents
- BOOKMARKS
- 1141147-2-A 1
- Tools/Outils/Herramientas 2
- Antes de comenzar 3
- 1. Prepare the Site 4
- Prepare el sitio 5
- 2. Install the Supplies 6
- Instale los suministros 7
- 3. Complete the Finished Wall 8
- 4. Install the Spout 9
- Installer le bec 10
- Instale el surtidor 10
- 5. Install the Mixer Valve 11
- 6. Install the Handle 12
- Installer la poignée 13
- Instale la manija 13
- Care and Cleaning 13
- Cuidado y limpieza 14
- Warranty 14
- Entretien et nettoyage 14
- Warranty (cont.) 15
- Garantie 16
- Garantía 17
- Garantía (cont.) 18
- Kohler Co. 19 1141147-2-A 19
Summary of Contents
Installation and Care GuideGuide d’installation et d’entretienGuía de instalación y cuidadoWall-Mount Lavatory FaucetRobinet de lavabo à montage mural
Installer le becConfirmer que trois vis de retenue préinstallées sont présentes dans la bridemurale et qu’elles ne dépassent pas dans le diamètre intér
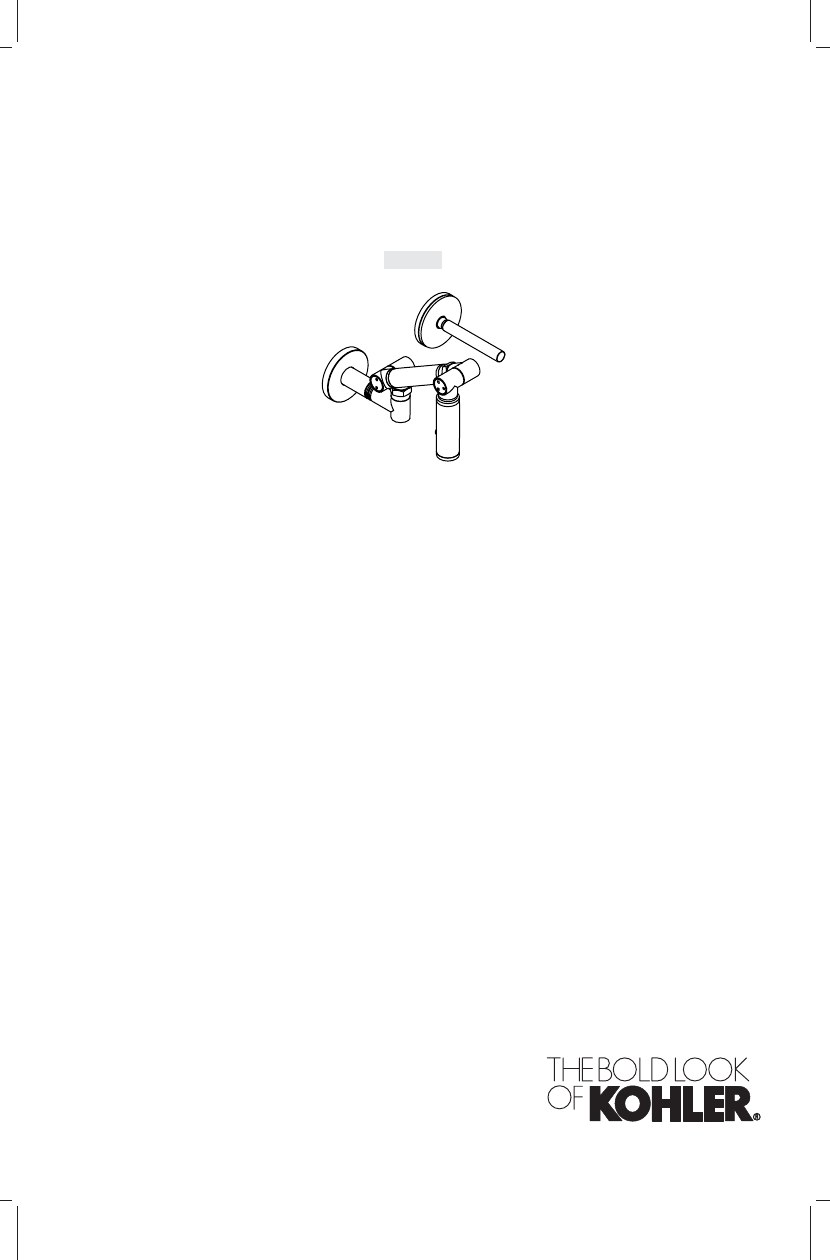
5. Install the Mixer ValveRemove the plaster guard from the mixer valve.Loosen the retaining ring so the valve can be repositioned.Using a straight ed
Instale la válvula mezcladoraRetire el protector de yeso de la válvula mezcladora.Afloje el anillo de retención de manera que se pueda cambiar la posic
Install the Handle (cont.)Fully tighten the setscrew into the handle.Turn on the water supply.Check for leaks.Installer la poignéeAppliquer du mastic
Care and Cleaning (cont.)For detailed cleaning information and products to consider, visit www.kohler.com/clean.To order Care & Cleaning informati
Warranty (cont.)States of America, Canada or Mexico (″North America″).Kohler Co. also warrants all other aspects of the faucet or accessories (″Faucet
GarantieGarantie limitée à vie du robinet KOHLER®Kohler Co. garantit que ses Robinets* fabriqués après le 1 Janvier 1997 ne fuient pas etne gouttent p
Garantie (cont.)**Ne jamais utiliser de nettoyants contenant des agents abrasifs, de l’ammoniaque, del’eau de Javel, des acides, des cires, de l’alcoo
Garantía (cont.)*La grifería Trend®; la torre MasterShowerTM; los sistemas y componentes BodySpaTM;latorre, sistemas y componentes WaterHavenTM; las g
Service Parts/Pièces de rechange/Piezas de repuesto1090945**SpringRessortResorte109094310953101141339**Spout/Bec/SurtidorO-RingJoint toriqueArosello10
Tools/Outils/HerramientasBefore You BeginCAUTION: Risk of property damage. Before finishing the wall, ensure the supplylines are connected to the mixer
Service Parts/Pièces de rechange/Piezas de repuesto (cont.)1018336** **Finish/color code must be specified when ordering.**Vous devez spécifier les co
Avant de commencer (cont.)NOTICE: Pour des installations de mur extérieur, s’assurer qu’une bonne isolation dumur soit installée afin d’éviter le gel d
1. Prepare the SiteInstall the FramingNOTE: The mixer valve requires special framing and support.Construct the framing for the faucet installation. A
Préparer le site (cont.)Vérifier que le cadrage construit est nivelé et sera parallèle au mur fini. Ajuster aubesoin.Fixer le robinet mélangeurAttacher
2. Install the SuppliesWARNING: Risk of property damage. Before finishing the wall, ensure thesupply lines are connected to the mixer valve with the co
Installer les alimentations (cont.)Installer les conduites d’alimentation de 1/2″ sur la valve du mitigeur avec laconduite d’alimentation d’eau froide
3. Complete the Finished WallComplete the finished wall.Measure and mark the hole centers 6″ (15.2 cm) apart from one another.Using a hole saw, drill a
4. Install the SpoutConfirm there are three setscrews pre-installed in the wall flange and notprotruding into the inside diameter of the wall flange. Adj
Related products and manuals for Sanitary ware Kohler K-6269-C11-BN
 (4 pages)
 (24 pages)
 (16 pages)
© 2020, manymanuals.com. All rights reserved. | 2.314 s |
 Manymanuals.com
 Manymanuals.de
 Manymanuals.fr
 Manymanuals.it
 Manymanuals.pl
 Manymanuals.cz
 Manymanuals.es
 Manymanuals-pt.com
Comments to this Manuals